6 캐릭터 생성, 저장, 조회 구현하기
지난번 연재 6-1, 6-2, 6-3과 이어집니다.
6.1 캐릭터 생성 구현하기
6.1.8 색상선택 Popup 구현하기
이번장에서는 스크롤뷰에 들어있는 메뉴가 선택이 되면 어떤 색상으로 지정할 것인지를 선택할 수 있는 팝업을 구현해보도록 하겠습니다.
먼저 필요한 변수와 태그를 정의하고 해당 메뉴아이템에 콜백 메서드를 등록합니다.
----------CharacterScene.h----------
#include "cocos2d.h"
#include "cocos-ext.h"
USING_NS_CC;
USING_NS_CC_EXT;
class CharacterScene : public cocos2d::Layer
{
public:
//생성자
CharacterScene();
//소멸자
~CharacterScene();
// there's no 'id' in cpp, so we recommend returning the class instance pointer
static cocos2d::Scene* createScene();
// Here's a difference. Method 'init' in cocos2d-x returns bool, instead of returning 'id' in cocos2d-iphone
virtual bool init();
// implement the "static create()" method manually
CREATE_FUNC(CharacterScene);
Sprite *_characterBg;
void onClickMenu(Ref *object);
void onClickHome(Ref *object);
void onClickRandom(Ref *object);
void onClickSave(Ref *object);
void onClickGallery(Ref *object);
void setImage(std::string tableName, int rowNo, int colorNo);
Sprite *_face;
Sprite *_hair1;
Sprite *_hair2;
Sprite *_eye;
Sprite *_mouth;
Sprite *_etc;
Sprite *_bgStyle;
//포지션에 따라 말풍선의 화살표의 위치를 변경한다.
void setBalloon(int position);
Sprite *_arrow;
Sprite *_balloon;
ScrollView *_scrollView;
void setSubMenuItem(int position);
std::string _currentTableName;
void showColorPopup(Ref *object);
};
----------CharacterScene.cpp----------
…생략…
void CharacterScene::setSubMenuItem(int position){
std::string table;
switch (position)
{
case 1:
table = "TB_FACE";
break;
case 2:
table = "TB_HAIR1";
break;
case 3:
table = "TB_HAIR2";
break;
case 4:
table = "TB_EYE";
break;
case 5:
table = "TB_MOUTH";
break;
case 6:
table = "TB_ETC";
break;
case 7:
table = "TB_BG";
break;
}
_currentTableName = table;
//이전에 데이터 베이스 구축당시 No를 0으로 넣으면 해당 테이블 전체를 가져오도록 구현
auto headList = DatabaseManager::getInstance()->selectDB(table, 0);
//메뉴아이템을 동적으로 생성하기위해 Array를 사용하였다.
Vector<MenuItem*> itemArray;
//for구문에 headList.size()를 조건문에 넣으면 pop_front를 하면서 size()가 줄어들어 원하는 값보다 적게 반복문을 실행한다. 따라서 미리 크기를 가져와 변수로 사용하였다.
int listCnt = headList.size();
float iconWidth = 0;
for (int i = 0; i < listCnt; i++){
//첫번째 구조체 가져오기
auto head = headList.front();
char icon[50];
//아이콘은 i_파일명으로 이름을 정해놓았습니다. 이런식으로 사용하면 따로 아이콘 파일명을 가질 필요없이 사용이 가능합니다.
sprintf(icon, "i_%s", head->image);
auto item_img = Sprite::create(icon);
if (iconWidth <= 0){
//icon width 크기
iconWidth = item_img->getContentSize().width;
}
auto item = MenuItemSprite::create(item_img, NULL, CC_CALLBACK_1(CharacterScene::showColorPopup, this));
//번호를 tag로 지정
item->setTag(head->no);
item->setAnchorPoint(Point(0, 0.5));
//아이템의 가로크기 x i 만큼 + 5(padding) x i 만큼에 위치시켰다.
item->setPosition(Point(i * item_img->getContentSize().width + 5 * i, _scrollView->getContentSize().height / 2));
itemArray.pushBack(item);
headList.pop_front();
}
auto menu = Menu::createWithArray(itemArray);
menu->setPosition(Point::ZERO);
_scrollView->getContainer()->setLocalZOrder(-1);
auto ContainerSize = Size(listCnt * iconWidth + 5 * (listCnt - 1), _scrollView->getContainer()->getContentSize().height);
_scrollView->getContainer()->setContentSize(ContainerSize);
_scrollView->getContainer()->addChild(menu);
}
void CharacterScene::showColorPopup(Ref *object){
auto node = ((Node *)object);
log("tableName : %s, tag : %d", _currentTableName.c_str(), node->getTag());
}
_currentTableName이란 string변수와 showColorPopup()이란 메서드를 선언하고 MenuItemSprite의 콜백 메서드를 등록하고 번호를 태그로 지정하였습니다.
디버거를 실행하고 말풍선의 item들을 눌러 로그를 확인해봅니다.
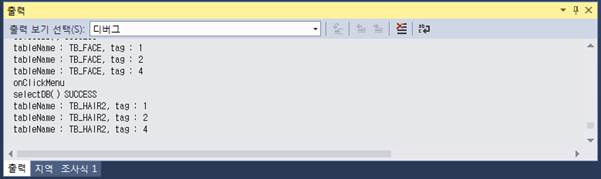
Figure 6‑44 디버그 로그
로그가 제대로 출력되는 것을 확인하였습니다.
테이블이름과 몇번이 눌렸는지를 알 수 있으니 해당테이블의 번호의 값을 가져와 사용할 수 있습니다.
화면에 띄워줄 팝업 Class를 만들어보도록 하겠습니다.
팝업을 화면에 구성해주는 것이 아니라 다른 Class로 만들어주어 팝업외의 터치 이벤트를 막아주는 것이 팝업 아래의 메뉴아이템들을 안눌리게 하기 쉽습니다.
먼저 팝업 클레스를 생성해줍니다.
ColorPopup이라는 이름의 Class를 Classes폴더에 생성합니다. [5.3장] 참고
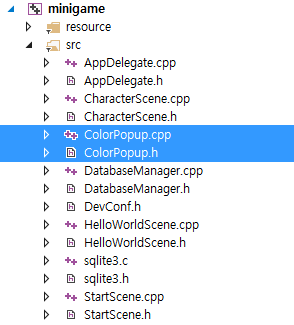
Figure 6‑45 클래스 추가
ColorPopup.h파일과 ColorPopup.cpp 파일을 아래와 같이 수정합니다.
----------ColorPopup.h----------
#include "cocos2d.h"
USING_NS_CC;
class ColorPopup :public Layer
{
public:
ColorPopup();
~ColorPopup();
static ColorPopup * create(std::string tableName, int no);
bool init(std::string tableName, int no);
};
----------ColorPopup.cpp----------
#include "ColorPopup.h"
ColorPopup::ColorPopup()
{
}
ColorPopup::~ColorPopup()
{
}
ColorPopup * ColorPopup::create(std::string tableName, int no){
ColorPopup *ret = new ColorPopup();
if (ret && ret->init(tableName, no))
{
ret->autorelease();
}
else
{
CC_SAFE_DELETE(ret);
}
return ret;
}
bool ColorPopup::init(std::string tableName, int no){
log("%s, %d", tableName.c_str(), no);
//여기에 팝업을 작성한다.
//Device의 크기를 가져옵니다.
auto winSize = Director::getInstance()->getOpenGLView()->getDesignResolutionSize();
auto back = Sprite::create("bg_color_box.png");
back->setPosition(Point(winSize.width / 2, winSize.height / 2));
this->addChild(back);
return true;
}
이 클래스는 tableName과 no를 넘겨 받는 Layer를 상속받은 클래스입니다.
그럼 이 ColorPopup을 CharacterScene에서 호출해보도록 하겠습니다.
----------CharacterScene.cpp----------
#include "CharacterScene.h"
#include "DatabaseManager.h"
#include "DevConf.h"
#include "ColorPopup.h"
USING_NS_CC;
…생략…
void CharacterScene::showColorPopup(Ref *object){
auto node = ((Node *)object);
log("tableName : %s, tag : %d", _currentTableName.c_str(), node->getTag());
ColorPopup* popup = ColorPopup::create(_currentTableName, node->getTag());
//다른노드들 보다 zOrder를 위로 주어 최상단에 나오도록 한다.
this->addChild(popup, 10);
}
ColorPopup.h 파일을 include에 추가하고 showColorPopup에서 tableName과 no를 넘겨 추가해줍니다.
디버거를 실행해 제대로 팝업화면이 나오는지 확인해봅니다.
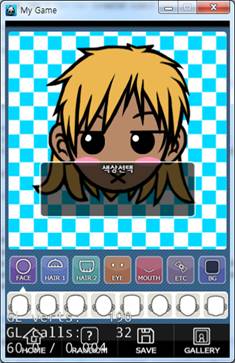
Figure 6‑46 실행화면
화면 가운데 색상선택 ColorPopup에서 추가한 이미지가 출력되었습니다.
그런데 문제는 팝업을 띄웠는데 팝업과 원래의 레이어의 구분이 없고 팝업 아래의 메뉴 버튼들이 눌린다는 문제가 있습니다.
색상선택 팝업쪽에 집중이 될 수 있도록 UI를 수정하고 팝업 아래의 메뉴아이템들이 눌리지 않도록 touch우선순위를 수정하겠습니다.
먼저 UI부분부터 수정하겠습니다.
----------ColorPopup.cpp----------
…생략…
bool ColorPopup::init(std::string tableName, int no){
log("%s, %d", tableName.c_str(), no);
//여기에 팝업을 작성한다.
//Device의 크기를 가져옵니다.
auto winSize = Director::getInstance()->getOpenGLView()->getDesignResolutionSize();
auto fadeBack = LayerColor::create(Color4B(0, 0, 0, 200), winSize.width, winSize.height);
this->addChild(fadeBack);
auto back = Sprite::create("bg_color_box.png");
back->setPosition(Point(winSize.width / 2, winSize.height / 2));
this->addChild(back);
return true;
}
200의 투명도를 가진 검정색의 LayerColor를 만들어 추가해주었습니다.
디버거를 실행해 확인해보도록 하겠습니다.
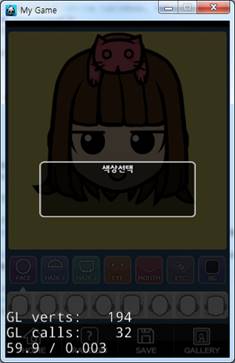
Figure 6‑47 실행화면
이제 팝업 아래의 부분은 눌리지 않는다는 것을 직관적으로 알 수 있게 되었습니다.
이번엔 fadeBack에 애니메이션을 추가해 디테일을 추가해보도록 하겠습니다.
----------ColorPopup.cpp----------
…생략…
bool ColorPopup::init(std::string tableName, int no){
log("%s, %d", tableName.c_str(), no);
//여기에 팝업을 작성한다.
//Device의 크기를 가져옵니다.
auto winSize = Director::getInstance()->getOpenGLView()->getDesignResolutionSize();
auto fadeBack = LayerColor::create(Color4B(0, 0, 0, 0), winSize.width, winSize.height);
this->addChild(fadeBack);
fadeBack->runAction(FadeTo::create(0.5f, 200));
auto back = Sprite::create("bg_color_box.png");
back->setPosition(Point(winSize.width / 2, winSize.height / 2));
this->addChild(back);
return true;
}
fadeBack을 생성할 때 투명도를 0으로 수정해주고 fadeBack에 투명도를 200까지 변화시키는 애니메이션을 추가하였습니다. FadeTo는 지정해준 시간동안 지정된 투명도로 변화하는 애니메이션 입니다.
디버거를 실행해 애니메이션이 제대로 실행되는지 확인해보도록 합니다.
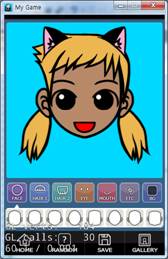
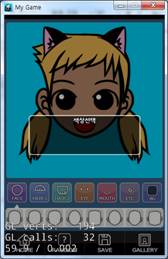
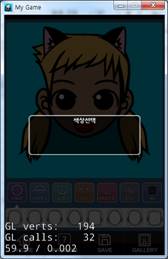
Figure 6‑48 실행화면
이미지와 애니메이션을 추가했으니 이제 팝업아래의 레이어들은 눌리지 않도록 수정하겠습니다.
ColorPopup.h파일과 ColorPopup.cpp 파일을 아래와 같이 수정합니다.
----------ColorPopup.h----------
#include "cocos2d.h"
USING_NS_CC;
class ColorPopup :public Layer
{
public:
ColorPopup();
~ColorPopup();
static ColorPopup * create(std::string tableName, int no);
bool init(std::string tableName, int no);
void onEnter();
bool onTouchBegan(Touch* touch, Event* event);
};
----------ColorPopup.cpp----------
…생략…
void ColorPopup::onEnter(){
Layer::onEnter();
setTouchEnabled(true);
setTouchMode(Touch::DispatchMode::ONE_BY_ONE);
}
bool ColorPopup::onTouchBegan(Touch* touch, Event* event){
return true;
}
onEnter()와 onTouchBegan() 메서드를 추가했습니다.
간단하게 설명하면 onEnter()는 해당 클레스가 생성될 때 라이프사이클에 맞추어 호출됩니다.
그리고 onEnter()에서 터치를 사용하도록 추가해주었습니다.
onTouchBegan()은 터치가 시작될 때 호출됩니다.
onTouchMoved()와 onTouchEnded(), onTouchCancelled()도 있지만 터치를 추가하고 onTouchBegan()이 없으면 에러가 발생합니다.
onTouchMoved()와 onTouchEnded(), onTouchCancelled()는 선언하지 않아도 에러가 발생하지 않습니다.
디버거를 실행하여 팝업이 추가되고 CharacterScene의 메뉴아이템들이 눌리지 않는지 확인하도록 합니다.
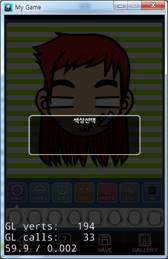
Figure 6‑49 실행화면
메뉴아이템들이 눌리지 않는 것을 확인할 수 있습니다.
터치 우선순위 수정을 완료하였으니 ColorPopup의 기능을 구현하겠습니다.
----------ColorPopup.h----------
#include "cocos2d.h"
USING_NS_CC;
class ColorPopup :public Layer
{
public:
ColorPopup();
~ColorPopup();
static ColorPopup * create(std::string tableName, int no);
bool init(std::string tableName, int no);
void onEnter();
bool onTouchBegan(Touch* touch, Event* event);
std::string _tableName;
int _no;
};
----------ColorPopup.cpp----------
#include "ColorPopup.h"
#include "DatabaseManager.h"
…생략…
bool ColorPopup::init(std::string tableName, int no){
log("%s, %d", tableName.c_str(), no);
//여기에 팝업을 작성한다.
_tableName = tableName;
_no = no;
//Device의 크기를 가져옵니다.
auto winSize = Director::getInstance()->getOpenGLView()->getDesignResolutionSize();
auto fadeBack = LayerColor::create(Color4B(0, 0, 0, 0), winSize.width, winSize.height);
this->addChild(fadeBack);
fadeBack->runAction(FadeTo::create(0.5f, 200));
auto back = Sprite::create("bg_color_box.png");
back->setPosition(Point(winSize.width / 2, winSize.height / 2));
this->addChild(back);
//테이블 이름과 번호를 넣어 값을 가져온다.
auto headList = DatabaseManager::getInstance()->selectDB(_tableName, _no);
//첫번째 구조체 가져오기
auto head = headList.front();
auto color1 = Sprite::create("box_color.png");
color1->setColor(head->color1);
auto itemColor1 = MenuItemSprite::create(color1, NULL);
itemColor1->setPosition(Point(35, 30));
auto color2 = Sprite::create("box_color.png");
color2->setColor(head->color2);
auto itemColor2 = MenuItemSprite::create(color2, NULL);
itemColor2->setPosition(Point(35 + 50, 30));
auto color3 = Sprite::create("box_color.png");
color3->setColor(head->color3);
auto itemColor3 = MenuItemSprite::create(color3, NULL);
itemColor3->setPosition(Point(35 + 100, 30));
auto color4 = Sprite::create("box_color.png");
color4->setColor(head->color4);
auto itemColor4 = MenuItemSprite::create(color4, NULL);
itemColor4->setPosition(Point(35 + 150, 30));
auto menu = Menu::create(itemColor1, itemColor2, itemColor3, itemColor4, NULL);
menu->setPosition(Point::ZERO);
back->addChild(menu);
return true;
}
매개변수로 받은 _tableName과 _no를 전역변수로 선언하여 정의해주고 head 구조체에서 색상을 가져와 Sprite에 색상을 지정하고 MenuItemSprite를 생성하였습니다.
디버거를 실행해 확인해보도록 합니다.
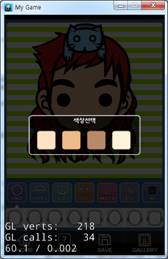
Figure 6‑50 실행화면
각 부분별로 색상이 제대로 추가된 것을 볼 수 있습니다.
색상을 선택하면 해당 색상이 추가되는 기능을 추가하겠습니다.
----------ColorPopup.h----------
#include "cocos2d.h"
USING_NS_CC;
class ColorPopup :public Layer
{
public:
ColorPopup();
~ColorPopup();
static ColorPopup * create(std::string tableName, int no);
bool init(std::string tableName, int no);
void onEnter();
bool onTouchBegan(Touch* touch, Event* event);
std::string _tableName;
int _no;
void onClickColor(Ref *object);
};
----------ColorPopup.cpp----------
#include "ColorPopup.h"
#include "DatabaseManager.h"
#include "CharacterScene.h"
…생략…
bool ColorPopup::init(std::string tableName, int no){
log("%s, %d", tableName.c_str(), no);
//여기에 팝업을 작성한다.
_tableName = tableName;
_no = no;
//Device의 크기를 가져옵니다.
auto winSize = Director::getInstance()->getOpenGLView()->getDesignResolutionSize();
auto fadeBack = LayerColor::create(Color4B(0, 0, 0, 0), winSize.width, winSize.height);
this->addChild(fadeBack);
fadeBack->runAction(FadeTo::create(0.5f, 200));
auto back = Sprite::create("bg_color_box.png");
back->setPosition(Point(winSize.width / 2, winSize.height / 2));
this->addChild(back);
//테이블 이름과 번호를 넣어 값을 가져온다.
auto headList = DatabaseManager::getInstance()->selectDB(_tableName, _no);
//첫번째 구조체 가져오기
auto head = headList.front();
auto color1 = Sprite::create("box_color.png");
color1->setColor(head->color1);
auto itemColor1 = MenuItemSprite::create(color1, NULL, CC_CALLBACK_1(ColorPopup::onClickColor, this));
itemColor1->setTag(1);
itemColor1->setPosition(Point(35, 30));
auto color2 = Sprite::create("box_color.png");
color2->setColor(head->color2);
auto itemColor2 = MenuItemSprite::create(color2, NULL, CC_CALLBACK_1(ColorPopup::onClickColor, this));
itemColor2->setTag(2);
itemColor2->setPosition(Point(35 + 50, 30));
auto color3 = Sprite::create("box_color.png");
color3->setColor(head->color3);
auto itemColor3 = MenuItemSprite::create(color3, NULL, CC_CALLBACK_1(ColorPopup::onClickColor, this));
itemColor3->setTag(3);
itemColor3->setPosition(Point(35 + 100, 30));
auto color4 = Sprite::create("box_color.png");
color4->setColor(head->color4);
auto itemColor4 = MenuItemSprite::create(color4, NULL, CC_CALLBACK_1(ColorPopup::onClickColor, this));
itemColor4->setTag(4);
itemColor4->setPosition(Point(35 + 150, 30));
auto menu = Menu::create(itemColor1, itemColor2, itemColor3, itemColor4, NULL);
menu->setPosition(Point::ZERO);
back->addChild(menu);
return true;
}
…생략…
void ColorPopup::onClickColor(Ref *object){
log("onClickColor");
int ColorTag = ((Node *)object)->getTag();
//부모를 가져온다.
auto parent = (CharacterScene *)this->getParent();
//부모의 메서드를 호출한다.
parent->setImage(_tableName, _no, ColorTag);
this->removeFromParentAndCleanup(true);
}
MenuItemSprite에 태그를 추가하고 onClickColor()를 콜백 메서드로 등록하였습니다.
onClickColor()에서 tag를 받아 부모 클래스의 setImage()를 호출해주었습니다.
ColorPopup은 CharacterScene에 add가 되어있기 때문에 getParent로 부모인 CharacterScene을 가져올 수 있습니다.
부모의 메서드를 호출한 뒤 removeFromParentAndCleanup()을 호출해 자기자신의 Class를 제거해줍니다.
디버거를 실행해 제대로 기능이 동작하는지 확인하도록 합니다.
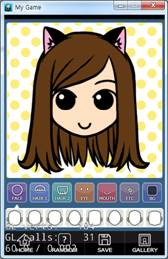
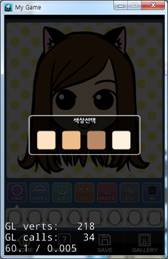
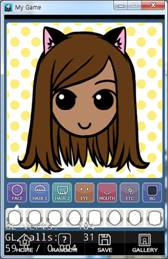
Figure 6‑51 얼굴 / 얼굴색 변경
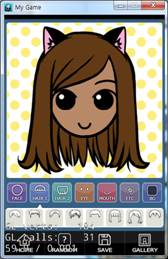

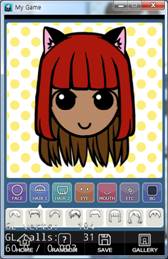
Figure 6‑52 머리 / 머리색 변경
선택한 모양과 선택한 색상으로 수정되며 색상선택 팝업이 제대로 동작하는 것을 확인 할 수 있습니다.
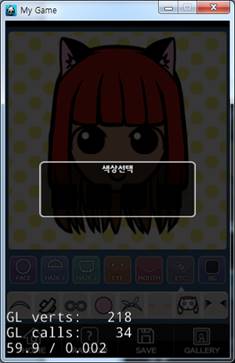
Figure 6‑53 실행화면
색상 수정이 불가능한 파트의 경우 검정색으로 나오며 눌렀을 때 지정된 색으로만 지정되는 것을 확인할 수 있습니다.
색상 수정이 불가능한 파트 선택시 바로 적용되도록 수정하겠습니다.
----------CharacterScene.cpp----------
…생략…
void CharacterScene::showColorPopup(Ref *object){
auto node = ((Node *)object);
log("tableName : %s, tag : %d", _currentTableName.c_str(), node->getTag());
auto headList = DatabaseManager::getInstance()->selectDB(_currentTableName, node->getTag());
auto head = headList.front();
if (!head->isColor){
//색상 선택이 불가능한 파트는 색상은 아무거나 넣어도 되므로 아무숫자나 넣었습니다.
setImage(_currentTableName, head->no, -1);
return;
}
ColorPopup* popup = ColorPopup::create(_currentTableName, node->getTag());
//다른노드들 보다 zOrder를 위로 주어 최상단에 나오도록 한다.
this->addChild(popup, 10);
}
넘겨받은 번호를 데이터베이스에서 가져와 isColor를 체크하였습니다. isColor가 false면 바로 이미지를 지정하고 return; 되어 메서드를 바로 빠져나가 버립니다.
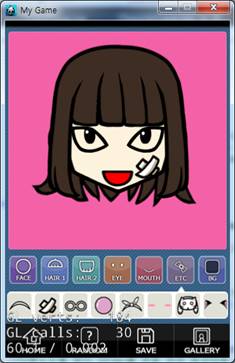
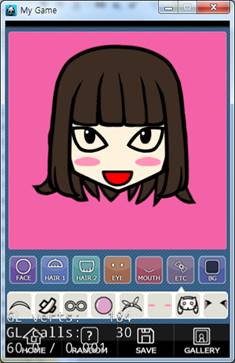
Figure 6‑54 실행화면
팝업이 출력되지 않고 바로 적용되는 것을 확인할 수 있습니다.