6 캐릭터 생성, 저장, 조회 구현하기
6장부터는 출판사 교정을 거치지 않은 상태로서 맞춤법이 틀린 곳이나 오탈자가 있을 수 있습니다. 양해 부탁합니다.
6.1 캐릭터 생성 구현하기
6.1.1 기본 레이아웃 구성하기
<캐릭터 만들기> 캐릭터 생성 화면에서 기본이 될 UI를 구현하겠습니다.
CharacterScene.h와 CharacterScene.cpp를 아래와 같이 수정합니다.
----------CharacterScene.h----------
#include "cocos2d.h"
USING_NS_CC;
class CharacterScene : public cocos2d::Layer
{
public:
// there's no 'id' in cpp, so we recommend returning the class instance pointer
static cocos2d::Scene* createScene();
// Here's a difference. Method 'init' in cocos2d-x returns bool, instead of returning 'id' in cocos2d-iphone
virtual bool init();
// implement the "static create()" method manually
CREATE_FUNC(CharacterScene);
Sprite *_characterBg;
};
----------CharacterScene.cpp----------
…생략…
// on "init" you need to initialize your instance
bool CharacterScene::init()
{
//////////////////////////////
// 1. super init first
if (!Layer::init())
{
return false;
}
//code here
/*****Device의 크기를 가져옵니다.*****/
//Director를 가져옵니다.
auto director = Director::getInstance();
//OpenGLView를 가져옵니다.
auto glView = director->getOpenGLView();
//OpenGLView에서 DesignResolutionSize를 가져옵니다.
auto winSize = glView->getDesignResolutionSize();
/*****Device의 크기를 가져옵니다.*****/
//배경 추가
auto back = Sprite::create("bg_main.png");
back->setPosition(Point(winSize.width / 2, winSize.height / 2));
this->addChild(back);
//캐릭터 박스 추가
_characterBg = Sprite::create("bg_1.png");
//Node의 기준을 상단중앙으로 변경함. setAnchorPoint의 값은 0~1. 1이 100%입니다.
_characterBg->setAnchorPoint(Point(0.5, 1));
//AnchorPoint를 상단의 중앙으로 변경하여 상단에서 15px만큼 아래로 내렸다.
_characterBg->setPosition(Point(winSize.width / 2, winSize.height - 15));
//back에 자식노드로 추가함
back->addChild(_characterBg);
return true;
}
Sprite를 생성하고 화면에 위치시켰습니다.
_characterBg를 전역변수로 사용하기 위해서 Character.h에 Sprite로 선언하였습니다.
디버거를 실행하여 UI를 확인합니다.
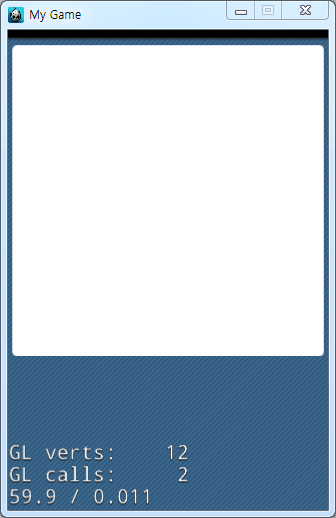
Figure 6‑1 실행화면
원하는 대로 UI가 위치된 것을 확인할 수 있습니다.
중간의 버튼들을 위치시키도록 합니다.
----------CharacterScene.cpp----------
…생략…
// on "init" you need to initialize your instance
bool CharacterScene::init()
{
//////////////////////////////
// 1. super init first
if (!Layer::init())
{
return false;
}
//code here
/*****Device의 크기를 가져옵니다.*****/
//Director를 가져옵니다.
auto director = Director::getInstance();
//OpenGLView를 가져옵니다.
auto glView = director->getOpenGLView();
//OpenGLView에서 DesignResolutionSize를 가져옵니다.
auto winSize = glView->getDesignResolutionSize();
/*****Device의 크기를 가져옵니다.*****/
//배경 추가
auto back = Sprite::create("bg_main.png");
back->setPosition(Point(winSize.width / 2, winSize.height / 2));
this->addChild(back);
//캐릭터 박스 추가
_characterBg = Sprite::create("bg_1.png");
//Node의 기준을 상단중앙으로 변경함. setAnchorPoint의 값은 0~1. 1이 100%입니다.
_characterBg->setAnchorPoint(Point(0.5, 1));
//AnchorPoint를 상단의 중앙으로 변경하여 상단에서 15px만큼 아래로 내렸다.
_characterBg->setPosition(Point(winSize.width / 2, winSize.height - 15));
//back에 자식노드로 추가함
back->addChild(_characterBg);
//캐릭터 UI 선택 버튼 추가
auto menu1Face = MenuItemImage::create("btn_face.png", "btn_face_on.png");
menu1Face->setPosition(Point(25, 125));
auto menu1Hair1 = MenuItemImage::create("btn_hair1.png", "btn_hair1_on.png");
menu1Hair1->setPosition(Point(70, 125));
auto menu1Hair2 = MenuItemImage::create("btn_hair2.png", "btn_hair2_on.png");
menu1Hair2->setPosition(Point(115, 125));
auto menu1Eye = MenuItemImage::create("btn_eye.png", "btn_eye_on.png");
menu1Eye->setPosition(Point(160, 125));
auto menu1Mouth = MenuItemImage::create("btn_mouth.png", "btn_mouth_on.png");
menu1Mouth->setPosition(Point(205, 125));
auto menu1Etc = MenuItemImage::create("btn_etc.png", "btn_etc_on.png");
menu1Etc->setPosition(Point(250, 125));
auto menu1Bg = MenuItemImage::create("btn_bg.png", "btn_bg_on.png");
menu1Bg->setPosition(Point(295, 125));
auto menu1 = Menu::create(menu1Face, menu1Hair1, menu1Hair2, menu1Eye, menu1Mouth, menu1Etc, menu1Bg, NULL);
menu1->setPosition(Point::ZERO);
this->addChild(menu1);
return true;
}
MenuItemImage에는 normalImage와 selectImage를 지정하여 생성하였습니다.
생성된 MenuItemImage를 Menu에 추가하였고, Menu는 setPosition(Point::ZERO)를 입력하여 (0, 0)에 위치하도록 하였습니다.
디버거를 실행하여 확인합니다.
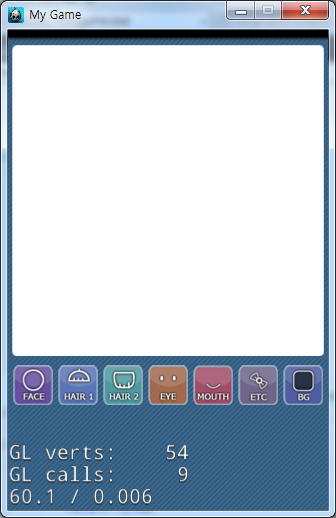
각 버튼이 제대로 눌리는지를 확인합니다.
모든버튼이 제대로 눌리는지를 확인했으면 콜백 메서드를 정의하도록 합니다.
CharacterScene.h 파일을 열어 아래와 같이 콜백 메서드들을 추가해줍니다.
----------CharacterScene.h----------
#include "cocos2d.h"
USING_NS_CC;
class CharacterScene : public cocos2d::Layer
{
public:
// there's no 'id' in cpp, so we recommend returning the class instance pointer
static cocos2d::Scene* createScene();
// Here's a difference. Method 'init' in cocos2d-x returns bool, instead of returning 'id' in cocos2d-iphone
virtual bool init();
// implement the "static create()" method manually
CREATE_FUNC(CharacterScene);
Sprite *_characterBg;
void onClickMenu(Ref *object);
};
CharacterScene.h에 콜백 메서드를 선언하였으면 선언된 메서드를 CharacterScene.cpp에서 정의하도록 합니다.
CharacterScene.cpp 파일을 열어 아래와 같이 CharacterScene.h파일에 선언된 메서드들을 정의해주고 정의된 메서드를 MenuItemImage에 추가해줍니다.
----------CharacterScene.cpp----------
…생략…
//캐릭터 UI 선택 버튼 추가
auto menu1Face = MenuItemImage::create("btn_face.png", "btn_face_on.png", CC_CALLBACK_1(CharacterScene::onClickMenu, this));
menu1Face->setPosition(Point(25, 125));
auto menu1Hair1 = MenuItemImage::create("btn_hair1.png", "btn_hair1_on.png", CC_CALLBACK_1(CharacterScene::onClickMenu, this));
menu1Hair1->setPosition(Point(70, 125));
auto menu1Hair2 = MenuItemImage::create("btn_hair2.png", "btn_hair2_on.png", CC_CALLBACK_1(CharacterScene::onClickMenu, this));
menu1Hair2->setPosition(Point(115, 125));
auto menu1Eye = MenuItemImage::create("btn_eye.png", "btn_eye_on.png", CC_CALLBACK_1(CharacterScene::onClickMenu, this));
menu1Eye->setPosition(Point(160, 125));
auto menu1Mouth = MenuItemImage::create("btn_mouth.png", "btn_mouth_on.png", CC_CALLBACK_1(CharacterScene::onClickMenu, this));
menu1Mouth->setPosition(Point(205, 125));
auto menu1Etc = MenuItemImage::create("btn_etc.png", "btn_etc_on.png", CC_CALLBACK_1(CharacterScene::onClickMenu, this));
menu1Etc->setPosition(Point(250, 125));
auto menu1Bg = MenuItemImage::create("btn_bg.png", "btn_bg_on.png", CC_CALLBACK_1(CharacterScene::onClickMenu, this));
menu1Bg->setPosition(Point(295, 125));
auto menu1 = Menu::create(menu1Face, menu1Hair1, menu1Hair2, menu1Eye, menu1Mouth, menu1Etc, menu1Bg, NULL);
menu1->setPosition(Point::ZERO);
this->addChild(menu1);
return true;
}
void CharacterScene::onClickMenu(Ref *object){
log("onClickMenu");
}
디버거를 실행해보고 콜백 메서드가 제대로 등록되었는지 눌러 로그가 출력되는지 확인해봅니다.
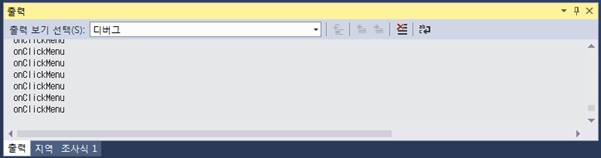
Figure 6‑2 버튼 콜백 로그
모든 로그가 제대로 출력되는 것을 확인하도록 합니다.
다음은 하단에 기능버튼들을 구현해보도록 합니다.
CharacterScene.cpp 파일을 열어 아래코드를 추가하도록 합니다.
----------CharacterScene.cpp----------
…생략…
auto menu1 = Menu::create(menu1Face, menu1Hair1, menu1Hair2, menu1Eye, menu1Mouth, menu1Etc, menu1Bg, NULL);
menu1->setPosition(Point::ZERO);
this->addChild(menu1);
//하단 메뉴 버튼의 좌표와 가로 세로크기 변수들
float x;
float y;
float width;
float height;
//하단 메뉴 버튼 추가
auto menu2Home = MenuItemImage::create("menu_home.png", "menu_home_on.png");
width = menu2Home->getContentSize().width;
height = menu2Home->getContentSize().height;
x = width / 2;
y = height / 2;
menu2Home->setPosition(Point(x, y));
auto menu2Random = MenuItemImage::create("menu_random.png", "menu_random_on.png");
x = menu2Home->getPositionX() + width;
menu2Random->setPosition(Point(x, y));
auto menu2Save = MenuItemImage::create("menu_save.png", "menu_save_on.png");
x = menu2Random->getPositionX() + width;
menu2Save->setPosition(Point(x, y));
auto menu2Gallery = MenuItemImage::create("menu_gallary.png", "menu_gallary_on.png");
x = menu2Save->getPositionX() + width;
menu2Gallery->setPosition(Point(x, y));
auto menu2 = Menu::create(menu2Home, menu2Random, menu2Save, menu2Gallery, NULL);
menu2->setPosition(Point::ZERO);
this->addChild(menu2);
return true;
}
캐릭터 UI 버튼 생성한 부분이랑 비슷합니다. 그러나 이번엔 버튼의 위치를 동적으로 지정해주었습니다.
버튼이 4개 존재하는데 옆 버튼의 위치를 가져와 계산하여 위치를 지정하였습니다.
getContentSize()는 Node의 width와 height를 가져옵니다.
첫번째 버튼의 경우 자신의 노드의 Width / 2 만큼 이동시키면 제일 왼쪽에 붙어 화면에 보이게 됩니다.
두번째 버튼부터는 이전 버튼의 X위치 + Width를 구하면 이전 버튼 바로옆에 위치시킬 수 있습니다.
디버거를 실행시켜 봅니다.
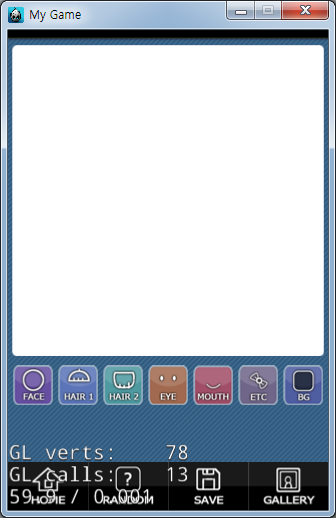
Figure 6‑3 실행화면
버튼이 제대로 눌러지는지 확인합니다.
버튼이 제대로 눌러진다면 이번에도 콜백 메서드를 등록하도록 합니다.
----------------CharacterScene.h----------------
#include "cocos2d.h"
USING_NS_CC;
class CharacterScene : public cocos2d::Layer
{
public:
// there's no 'id' in cpp, so we recommend returning the class instance pointer
static cocos2d::Scene* createScene();
// Here's a difference. Method 'init' in cocos2d-x returns bool, instead of returning 'id' in cocos2d-iphone
virtual bool init();
// implement the "static create()" method manually
CREATE_FUNC(CharacterScene);
Sprite *_characterBg;
void onClickMenu(Ref *object);
void onClickHome(Ref *object);
void onClickRandom(Ref *object);
void onClickSave(Ref *object);
void onClickGallery(Ref *object);
};
----------------CharacterScene.cpp----------------
…생략…
//하단 메뉴 버튼의 좌표와 가로 세로크기 변수들
float x;
float y;
float width;
float height;
//하단 메뉴 버튼 추가
auto menu2Home = MenuItemImage::create("menu_home.png", "menu_home_on.png", CC_CALLBACK_1(CharacterScene::onClickHome, this));
width = menu2Home->getContentSize().width;
height = menu2Home->getContentSize().height;
x = width / 2;
y = height / 2;
menu2Home->setPosition(Point(x, y));
auto menu2Random = MenuItemImage::create("menu_random.png", "menu_random_on.png", CC_CALLBACK_1(CharacterScene::onClickRandom, this));
x = menu2Home->getPositionX() + width;
menu2Random->setPosition(Point(x, y));
auto menu2Save = MenuItemImage::create("menu_save.png", "menu_save_on.png", CC_CALLBACK_1(CharacterScene::onClickSave, this));
x = menu2Random->getPositionX() + width;
menu2Save->setPosition(Point(x, y));
auto menu2Gallery = MenuItemImage::create("menu_gallary.png", "menu_gallary_on.png", CC_CALLBACK_1(CharacterScene::onClickGallery, this));
x = menu2Save->getPositionX() + width;
menu2Gallery->setPosition(Point(x, y));
auto menu2 = Menu::create(menu2Home, menu2Random, menu2Save, menu2Gallery, NULL);
menu2->setPosition(Point::ZERO);
this->addChild(menu2);
return true;
}
void CharacterScene::onClickMenu(Ref *object){
log("onClickMenu");
}
void CharacterScene::onClickHome(Ref *object){
log("onClickHome");
}
void CharacterScene::onClickRandom(Ref *object){
log("onClickRandom");
}
void CharacterScene::onClickSave(Ref *object){
log("onClickSave");
}
void CharacterScene::onClickGallery(Ref *object){
log("onClickGallery");
}
디버거를 실행하여 콜백 메서드가 제대로 등록되었는지 확인해봅니다.
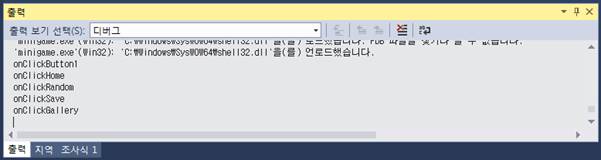
Figure 6‑4 버튼 콜백 로그
6.1.2 sqlite3 라이브러리 추가하기
iOS와 Android에서는 데이터베이스를 사용하는데 주로 sqlite을 사용합니다. 데이터베이스를 사용하는 이유는 정보를 저장하기 위해서 입니다. 여러 정보를 저장하는 방법은 다양한데 데이터베이스는 정보를 구조화하여 저장하고 사용하기 쉽게되어있습니다.
Cocos2d-x의 external에 sqlite이 있지만, sqlite공식 사이트에서 소스를 다운받아 추가하는 방법을 배워보도록 하겠습니다.
소스를 추가하면 플랫폼에 따른 라이브러리 설정을 따로 해주지 않아도 됩니다.
Cocos2d-x에서 sqlite를 사용할 수 있도록 sqlite 소스 코드를 추가하겠습니다.
http://www.sqlite.org/으로 접속 합니다.
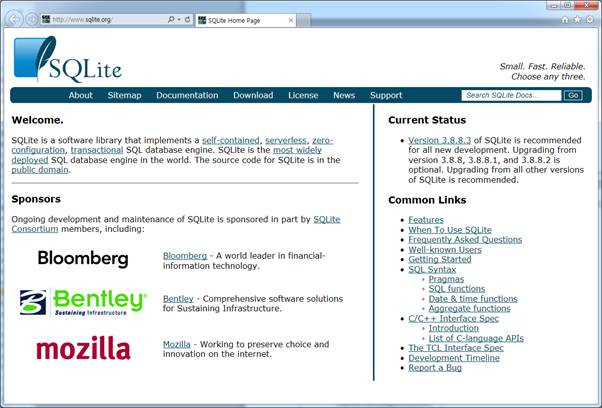
Figure 6‑5 sqlite 다운로드1
상단의 메뉴중 Download를 선택합니다.
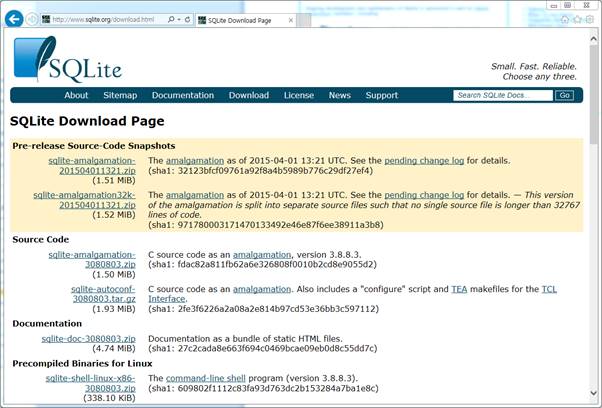
Figure 6‑6 sqlite 다운로드2
다운로드 화면이 나왔는데요. 소스 코드를 선택해 다운받도록 하겠습니다.
Source Code 중에서 zip파일로된 것을 선택하여 다운로드 받습니다.
다운로드 받은 파일의 압축을 풀어줍니다.
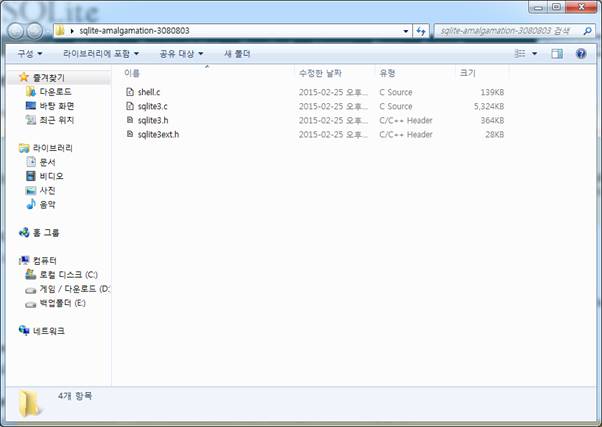
Figure 6‑7 sqlite 다운로드3
압축을 해제한 sqlite 폴더 내부로 들어가보면 shell.c, sqlite3.c, sqlite3.h, sqlite3ext.h 이렇게 4개의 파일이 있습니다.
우리는 sqlite3.c파일과 sqlite3.h 파일 두개만 사용합니다.
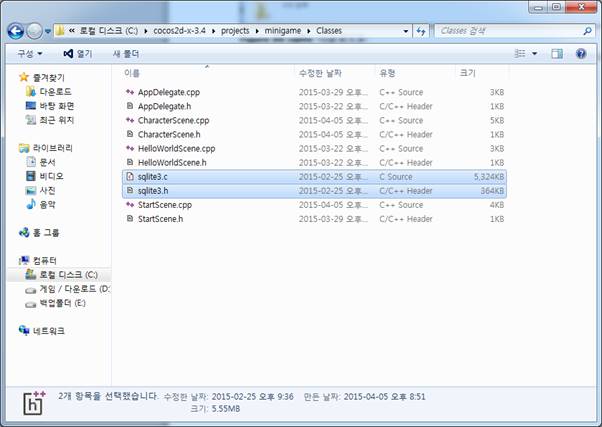
Figure 6‑8 sqlite 다운로드4
두 파일을 복사하여 minigame 프로젝트의 Classes폴더에 붙혀넣기 합니다.
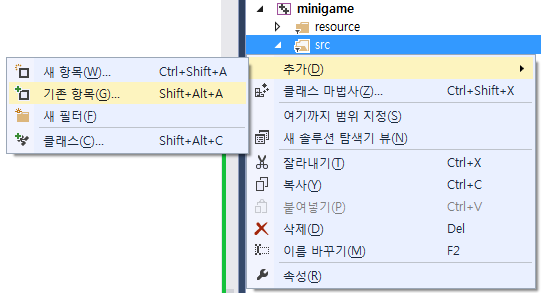
Figure 6‑9 sqlite 다운로드5
비주얼 스튜디오에서 프로젝트의 Classes를 오른쪽 버튼으로 선택한뒤 추가 – 기존 항목을 선택합니다.

Figure 6‑10 sqlite 다운로드6
Classes 폴더로 이동한뒤 sqlite3.h, sqlite3.c파일을 선택한뒤 Add를 누릅니다.
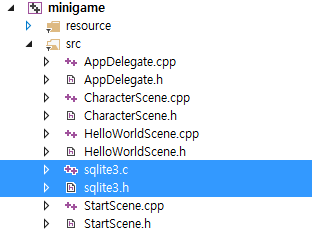
Figure 6‑11 sqlite 다운로드7
sqlite3.h, sqlite3.c파일을 추가하였습니다.
이렇게 sqlite3.h 파일과 sqlite3.c 파일을 추가함으로써 sqlite를 사용할 수 있습니다.